

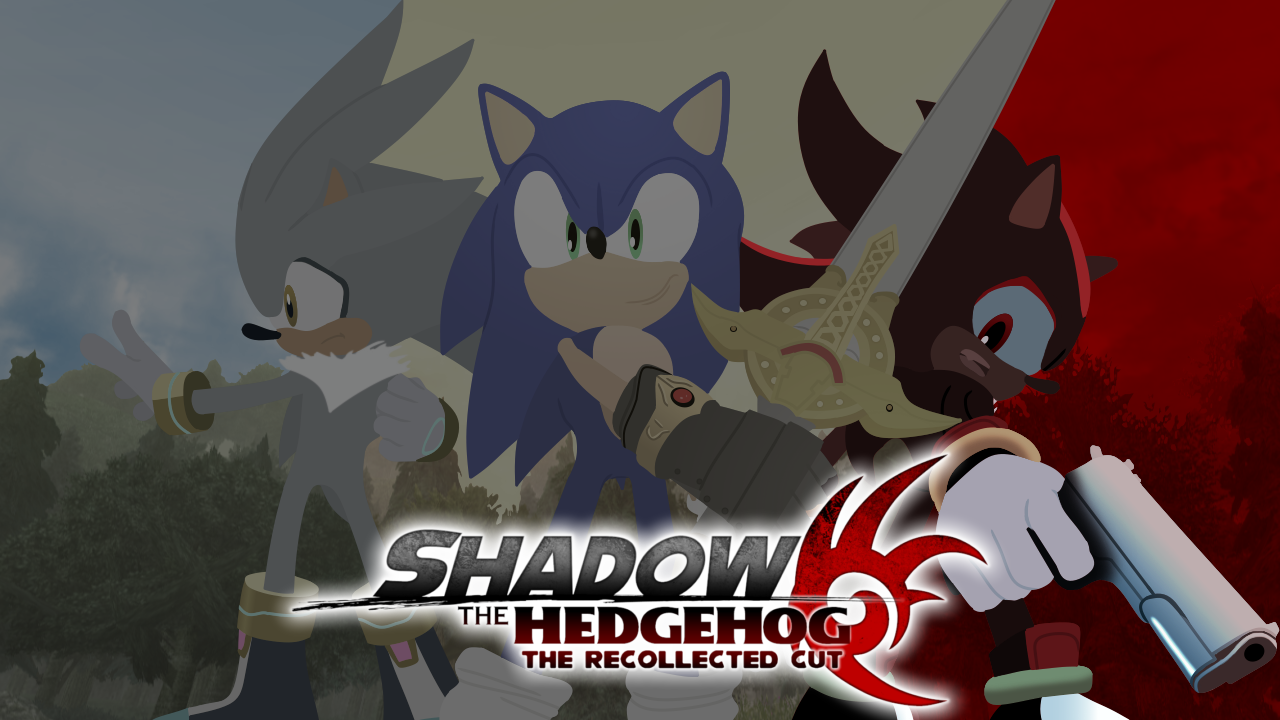
Shadow the Hedgehog: The Recollected Cut, The End of Sonic We Never Got | Part 1
Huh. All of a sudden, I feel about eight percent less embarrassed about my childhood.

CONTENT WARNING!
This post contains sensitive material that may not be suitable for all readers. The material in question includes:
- Bad language
Table of Contents
The Tarantino Effect
Shadow the Hedgehog: The Culmination of One Man's Dream
Shadow the Hedgehog: Intro Illustrations
The Tarantino Effect
No, this is not an unrelated bit. As a watcher of RedLetterMedia (less so than before, though), I’ve maintained that, if Mike and Rich stopped following modern Star Trek at season three of Picard, they’d probably be far more content now than they have been lately. Instead, their more recent review of Section 31 became a vessel through which to channel their inner “Trump-strations” or “AggreVance-tions”, as I call them. And as I choose to interpret them. Between Rich groveling that nothing will ever change because nobody cares anymore and Mike explaining that no one’s allowed to object when an infantile dictator like Alex Kurtzman’s behind the wheel, I was left saying, “These guys are not talking about Star Trek. This is a political allegory.” Therefore, I no longer see any reason to follow franchises I used to like, as it’s only going to perpetuate the annoying grievance that it simply isn’t what it was and never will be.
I did skim through the first ten minutes of Shadow Generations, however… and that’s all I’m seeing of that. Shadow stays out of Sonic’s wholesome birthday celebration to investigate a spatial anomaly on the ARK because he’s an agent of the alliance that killed his best friend now. Rouge has a sense of humor and he blows her off, further solidifying him as the same grade-A dickhead everyone obsesses over. Doom’s Eye brings him to a topsy-turvy version of Radical Highway and says, “We meet again, Shadow the Hedgehog.” He next takes Shadow to the White Space. Black Doom’s projection says the Black Arms are not extinct and will consume the Earth. Shadow says verbatim, “I defeated you once and I’ll do it again”—remember when he said “I’m putting the past behind me” before his story ended with a song called “Never Turn Back”?—then tries to kick, punch, and Chaos-Snap a remote projection. Cut! We’re done! I’m binge-watching The Golden Girls for the rest of the afternoon! See, there’s no longer a reason to complain about studios like those in Hollywood regurgitating old IPs for the sake of blind nostalgia as, with examples like this, Ghostbusters: Afterlife, and Spider-Man: No Way Home, it clearly still sells—if you get a few major successes, sticking to that model’s only natural from a business perspective.
By the way, who’s thrilled about seeing a black Severus Snape? Who’s supposed to be the same Snape as Alan Rickman?
Sure, Mike and Rich expressed gratitude that Section 31 was a singular movie instead of an ongoing series, but I still can’t force myself to sit through even another minute of Shadow Generations because it’s already precisely what I thought it would be, to the letter. I mean, it goes right ahead and says it’s just doing all the same things again. In the character dialogue. Plus, after hearing about what happens later, it’s not as though it does anything more emotionally or thematically impactful than anything already done before. So, on that note, you might recall my writing project Shadow the Hedgehog: The Recollected Cut (a rewrite of Shadow the Hedgehog) and its two expansion episodes, Episode Solaris (a rewrite of Sonic ’06) and Episode Storybook (combined rewrites of Secret Rings and Black Knight). Well, illustrations and minor revisions aside, I just finished the general writing as well as the illustrations for the base episode’s intro sequence. Today, we’re getting into a full changelog, which will compare and contrast the original games and their rewrites.
Yes. Every single change. Plus the intro illustrations for all three episodes. Buckle up, folks, ’cause this might take a while. I mean, hey, if Once Upon a Time… In Hollywood taught us anything, it’s that rewriting history can prove a beautiful reprieve from the harshness of reality. We can save the duty of repairing reality for Black Comet, the upcoming revision of which will be even more cathartic for matching the level of Sonic writing its now-twenty-something and thirty-something-year-old fans deserve and can be expected to handle and analyze.
Shadow the Hedgehog: The Culmination of One Man’s Dream
| Shadow the Hedgehog | The Recollected Cut |
|---|
Introduction
The intro (not the startup sequence) is calm and pleasant enough, all things considered. The newspaper that hits Shadow’s legs is a “Daily News” issue reporting on the “Fire-in-the-Sky Festival” for the fifty-year return of the Black Comet.
Not much has changed in these first couple shots. The only details are the less generic title of the newspaper, now The Westopolis Word, and the formatting of the headline.
Shadow’s monologue is punctuated with a new memory of Maria being shot while on the run. It’s never established when he regained this memory since Sonic Heroes, and he goes on to question who this Maria even is.
The wording of his monologue is changed to account for him not yet having been told of his past, plus his same desire to regain his memories from Heroes. He also doesn’t recall Maria or her death until later.
Shadow’s reaction to the Black Arm invasion is dismissive. We also only see the Black Oaks crushing cars and a brief glimpse of the other smaller units. Shadow turns away after calling the humans pathetic until Black Doom stops him, a hatred he’d attained since Heroes with no explanation. Heroes left him as a clean slate, but this line makes it seem inevitable that he would serve the Black Arms in the end instead of keeping him on the fence.
Shadow comes off as more put off by the invasion. The Black Oaks crush the cars alongside a shot of the other units overpowering law enforcement from the original game’s startup sequence. Confused, he questions what the humans did to deserve such brutality before turning away.
Black Doom orders that Shadow deliver him the Chaos Emeralds. Shadow asks him who he is and how he knows his name, but the projection of the dark lord fades, and his messenger Doom’s Eye zips away while leaving behind unnecessary explosions.
Shadow’s reaction is trimmed down for increased simplicity and naturalism, from “Who are you, and how do you know I’m Shadow? And what are you talking about?” to “How do you know my name?” Black Doom also expresses confusion that he doesn’t remember him but promises to help restore his memories if he aids the aliens in the city. Also, Doom’s Eye exits with no explosions.
For one reason or another, Shadow decides that he has to believe Black Doom because, as he reasons, the Chaos Emeralds are the key to his memories.
Shadow remains wary in this case, still unsure of who to trust. It’s also not until later that he reasons the Emeralds will unlock his memories, and for a specific reason.
Westopolis
Shadow meets Sonic in the city, who tells him to help clear out the aliens. Also, the art style is revealed to match that of Heroes, the vibrance and glossiness of which doesn’t fit the grimmer tone and aesthetic.
In an art style that more closely matches the intro and CG sequences, Sonic is being cornered by the aliens. The shot from the startup sequence of Shadow Chaos-Snapping them is inserted here, albeit with homing attacks instead of Chaos Snap, for which Sonic gives him his nonchalant thanks. Shadow quizzes him about what’s going on, but all he gets is the suggestion that they stop the Black Arms together. Sonic apologizes for his disrespectful response to Shadow’s return in Heroes; Shadow agrees to bury the hatchet since they’d both previously worked together to stop Metal Sonic.
Shadow finds a Chaos Emerald, which Sonic claims to contain unlimited power, in a glowing red Black Arm cage. He defeats the units and collects the artifact from inside.
G.U.N. is holding the Emerald in a cage of their own. Sonic’s claim triggers a flashback in Shadow, that is of Rouge saying all seven create a miracle in Sonic Adventure 2. Thus, Shadow’s given a clear reason to hunt down the Emeralds. G.U.N. almost grants Sonic access, but the Commander sends out an APB on Shadow. Shadow takes out the Soldiers before they attack and collects the Emerald alongside a shocked Sonic.
Doom’s Eye gives the order to scrub the city of G.U.N. Soldiers. Shadow then chooses whether to side with him, Sonic, or no one.
The order’s modified to include halting the evacuation, therefore proving the entire city wasn’t evacuated within minutes of an unforeseeable attack. Sonic tells Shadow to help; otherwise, he won’t be the same Shadow he stopped the ARK with. This prompts Shadow to recall his heroic sacrifice in Sonic Adventure 2, which he dedicated to Maria. He questions who this Maria is before choosing his moral trajectory.
Westopolis: Dark Mission
Shadow kills off the G.U.N. Soldiers; meanwhile, Doom’s Eye notices that the entire city has already been evacuated. Somehow.
Thanks to Doom’s Eye, Shadow notices and is informed of his negative Chaos form, then uses Chaos Blast on several Soldiers firing into him as seen in the startup sequence. He gets ahead of multiple evacuation buses and flips them over, much like he’s originally able to do in-game.
A scene shows the Commander receiving an update at G.U.N.’s headquarters. Upon learning that Shadow was in the city, he orders an APB on him with the eloquent explanation of, “He’s evil and he’s the enemy.”
This scene is scrapped from all three paths.
Shadow collects the second Emerald. After kicking two Soldiers unconscious back in the city, he asks Black Doom again who he is. Black Doom expresses confusion but promises Shadow he’ll remember with time. His next order is to wipe out the Federation’s digital mainframe, which Shadow agrees to.
When the next Emerald’s drawn to him for his deed, he’s left somewhat guilty by his actions and asks again who Black Doom is, but Black Doom refuses to divulge any intimate details. He wishes Gerald could witness the invasion, leaving Shadow confused by who this Gerald is. He’s promised that he’ll learn with time but to first wipe out the mainframe due to its data regarding national security. He’s told he can enter the mainframe via Chaos Control instead of a Cyberspace gateway.
Westopolis: Neutral Mission
The first G.U.N. headquarters scene follows.
N/A
Shadow collects the next Emerald. Black Doom is angered by this, but Shadow makes it clear that “no one tells ME what to do!” When Black Doom realizes Gerald sabotaged his memories, Shadow asks for clarification, but the entity silences him. He’s then zapped away to be punished for his disobedience.
After collecting the next Emerald, Shadow tells Black Doom he needs the Emeralds for his memories and that his disobedience is no skin off his nose. Black Doom realizes the extent of the free will Gerald gave Shadow but silences him when he asks who that is. While angered, Black Doom offers a last reprieve in the form of a mission to “awaken” the Black Arms’ temples via jewel switches in the desert to the west. He demands that Shadow pick his side wisely before zapping him away.
Westopolis: Hero Mission
Shadow rejoins Sonic to rid the city of Black Arm invaders.
At the tail-end of the original level after the end of the same mission, one of two Soldiers offers up the second Emerald, convinced of Shadow’s integrity.
The first G.U.N. headquarters scene follows.
N/A
Sonic tries to keep up the pace, to which Shadow shows nothing but undeserved contempt for him. Doom’s Eye orders Shadow to help the Black Arms retreat, but he reluctantly follows Sonic toward the freeway.
Sonic tells Shadow of the Black Arms trying to halt the evacuations along the freeway, which Shadow agrees to help stop. Revulsed by Shadow’s disobedience and realizing alongside Sonic that he doesn’t even remember Gerald, Doom’s Eye orders Shadow to help the Black Arms pull out from the city. With some uncertainty, Shadow follows Sonic toward the freeway.
Digital Circuit
Shadow enters Cyberspace through a transport tunnel, then gets told by Doom’s Eye to destroy the mainframe’s core program and plunge it into chaos. He also runs into Rouge, who asks him to help her collect a Chaos Emerald from the mainframe.
Once in Cyberspace, Doom’s Eye informs Shadow of the Sand Worms attacking the G.U.N. Soldiers, who use their unused Cyberspace color schemes from the original game. Also, after two G.U.N. Beetles are called off, Rouge admits that her assignment was to rid the aliens from the mainframe but that she chooses to steal the Emerald for herself. Shadow initially refuses to help, but with a chuckle, he agrees with the notion that he still owes her for busting him out in Heroes.
Digital Circuit: Dark Mission
Shadow makes it to the core program and sets it off in a white flash.
Shadow’s almost gunned down while climbing up the neon pole to the core program, yet he manages to both wipe it clean and receive the next Emerald. He’s also guided out once the program’s wiped, as the mainframe literally crumbles away before his very eyes.
At the White House, the President tells his secretary to pass on the message to the “commanding generals” that they’ll never surrender to terrorists, then looks to his photo of Sonic and Shadow for inspiration to keep the world united. When this photo was taken is a problem everyone has for some reason when it could’ve happened at any time between games, unlike more crucial events.
The President tells his secretary to pass on his message to the Commander, who enters the Oval Office right on time and informs him on what’s known of the extraterrestrials, including that Shadow was in the city when the invasion began. Still moved by his sacrifice, the President refuses to call Shadow a traitor. He ponders no longer being the leader of the universe as he knows it, then suggests isolating the aliens to Isla Nazca, the site of the stage Death Ruins in this rewrite.
Eggman watches the invasion, groveling that he can’t build his empire on Central City when there is no city. You know, as though Sonic Adventure never happened. He calls for the all-new Eggman Fleet to take flight.
Comedically, he grovels over the trouble the aliens are causing because only he should have that right. In this variation of the scene, he simply orders the Egg Pawns to retaliate and capture his future imperial territory.
Shadow exits Cyberspace in Eggman’s same office where Team Chaotix hacks into his mainframe. He sees Eggman flying past outside and chases him down for answers.
Alongside Doom’s Eye, Shadow watches the battle in Westopolis rage on in a couple of shots from the startup sequence. As promised, Doom’s Eye tells him that Gerald built the ARK and sought to save a dying family member through Project Shadow; the purpose of Shadow became revenge following the ARK raid. He then stops to tell Shadow to put Eggman on ice in his castle to the north for opposing the invasion.
Digital Circuit: Hero Mission
Shadow recovers the next Emerald from the mainframe alongside Rouge.
Shadow defies Rouge and takes the Emerald for himself, which she obviously doesn’t take kindly to. However, he gives her his reason, outwits her by asking for any other way to restore his memories, and warmly suggests that they exit the digital world. Although she comes off as annoyed, she’s revealed as having been charmed once his back is turned.
The first White House scene follows.
The first White House scene follows with the previous edits retained.
Glyphic Canyon
Shadow wakes up and finds himself in a desert canyon, then sets out to find out what the Black Arms are up to.
Shadow wakes up in the desert canyon as told to him, hoping to recover his memories in the middle of this turf war.
In the voice of a native English-speaking actor whose inflections randomly slope in peaks and valleys, Knuckles suggests that Shadow help him exterminate the invaders. Doom’s Eye also gives him the mission to activate the jewel switches and awaken the temples, therefore abandoning his punishment.
Knuckles is woken up in front of the first G.U.N. and alien firefight, expecting to find Rouge hunting for the jewel switches. Shadow considers helping him remove the Black Arms from the canyon until running into Doom’s Eye, who demands devotion to the mission.
Glyphic Canyon: Dark Mission
Shadow activates the jewel switches and awakens the temples.
Shadow figures the temples are the aliens’ rightful property and sets out to awaken them. He also notices one of the Nazca Lines etched in chalk, which Doom’s Eye only describes as a reminder of the aliens’ presence. Once the temples are awakened, he goes on to say they were built for the arrival of a leader above even him, a line from the original game that’s expanded to call it their former leader as to tie the rewrite to Black Comet. He then gives Shadow the same information regarding Gerald, as well as the order to infiltrate Eggman’s castle.
The first White House scene follows.
The first Eggman scene follows with the previous edits retained.
The scene with Shadow finding and chasing Eggman follows.
The first White House scene follows with the previous edits retained.
Glyphic Canyon: Neutral Mission
Shadow collects the next Emerald.
Shadow chooses not to drive off the Black Arms or revive their temples.
The first White House scene follows.
The first White House scene follows with the previous edits retained.
Glyphic Canyon: Hero Mission
Shadow clears off the Black Arms with Knuckles. Also, Knuckles swears in this mission, hence the knife against my wrist at the moment.
Without a single solitary swear, Shadow collects the next Emerald once Knuckles is confident the canyons have been cleared. Knuckles also asks Shadow to give Tails a hand at Eggman’s theme park, which he says he’ll consider if there’s an Emerald in the area.
The first White House scene follows.
The first White House scene follows with the previous edits retained.
Lethal Highway
Shadow meets Sonic, who’s chasing the mysterious Black Tank, on the freeway. Shortly before that, Doom’s Eye tells him the next Emerald has been secured and to lead the Black Arms out of the city.
Shadow learns from Doom’s Eye that the aliens’ primary objective is obtaining the Emeralds. Meanwhile, Sonic explains that he can’t penetrate the Black Tank due to it being shielded three-sixty degrees around.
Lethal Highway: Dark Mission
Shadow recovers the next Emerald from the freeway alongside Doom’s Eye. Also, Sonic swears should you happen to fail the hero mission. Fart in a jar.
Shadow defends the Black Arms and snags the Emerald, having already abandoned Sonic at this point. Doom’s Eye then says he’ll be meeting him around the block.
Lethal Highway: Hero Mission
Shadow obliterates the Black Tank with Sonic.
While after the Tank, Shadow gets the idea to hijack an abandoned motorbike and bail moments before crashing into it, replicating part of the startup sequence but with a clearer intent behind it. Sonic also makes a cute wisecrack to make up for his swear in the original game.
Black Bull (Lethal Highway: Dark Mission)
Shadow and Sonic run into Doom’s Eye. Shadow demands to receive the next Emerald and makes it clear that he’s seeking answers, not a fight; instead, the Black Bull is summoned to turn Sonic, Shadow, and their environment to ash.
Shadow meets with Doom’s Eye as instructed, upon which he’s credited with the Black Arms’ retreat but reprimanded for disrupting the initial invasion. Shadow makes it clear that he’s collecting the Emeralds for himself, not the aliens, so Doom’s Eye summons the Black Bull to show him his place. Shadow proceeds to win the battle without Sonic’s assistance.
The first White House scene follows.
The first White House scene follows with the previous edits retained.
Black Bull (Lethal Highway: Hero Mission)
The scene before this version of the boss is repeated verbatim.
Shadow and Sonic run into Doom’s Eye, and Shadow demands to receive the next Emerald. Doom’s Eye calls it a privilege he’s yet to earn, and when Shadow insists on sparing a species he knows nothing about, Doom’s Eye summons the Black Bull to set the two hedgehogs and the rest of the block ablaze. Both hedgehogs cooperate in order to win the battle, and Sonic asks Shadow to give Tails a hand at Eggman’s theme park, which Shadow agrees to despite reminding him it’s the Emeralds he’s looking for.
The first White House scene follows.
The first White House scene follows with the previous edits retained.
Cryptic Castle
Shadow enters Eggman’s castle and meets Amy, who tells him Cream got lost inside and has yet to come back out. Further in, Eggman requests that the invasion on his territory be stalled by lighting his blue defense lanterns. Also, it’s along the way that Amy shows a soft spot for the Egg Pawns fighting off the aliens, even though it’s for Eggman’s benefit.
Shadow finds Amy pummeling both Black Arms and Egg Pawns, and she tells him that Cream, in too big a rush to grow up lately, got lost inside looking for Cheese. Though disinterested, he considers helping her when she informs him of the Emerald in Eggman’s possession. Eggman gives Shadow his mission, and after learning why Shadow’s after the Emeralds, Amy tries to sway him by reminding him that he’d first saved the world thanks to her advice.
Cryptic Castle: Dark Mission
Shadow lights the lanterns for Eggman.
Shadow’s disturbed upon finding a lantern chamber littered with chao, who Eggman claims are being used to power his castle. Shadow tells Eggman he has problems and Eggman calls him a genocidal mystery man’s errand boy, so they both end up even. In the end, Shadow snaps his last giant torch in half and swears to never follow his orders again.
Cryptic Castle: Neutral Mission
Shadow reaches the goal ring.
Few changes other than self-banter were made, particularly Shadow’s reactions to the chao in the lantern room and the giant skeleton walker at the end.
Cryptic Castle: Hero Mission
Shadow finds Cream, then Cheese, inside the castle alongside Amy.
Shadow shows a kinder protective side toward Amy, even as the ghosts spook her into annoying him. Cream scolds Cheese for staying in the castle, Amy scolds Cream for getting lost, and it’s insinuated that Cheese may have been used to breed the newborn chao in the lantern chamber.
Egg Breaker (Cryptic Castle: Dark Mission)
Shadow finds the next Emerald, but Eggman stops him in his new machine before he can obtain it. He tries explaining why he needs the Emerald, but Eggman refuses to hand it over without a fight. Thereafter, Amy joins Shadow for the battle.
Amy stays absent. Eggman applauds Shadow for helping fortify his castle… then admits mockingly that he’d been using him all along. For this, Shadow takes the Emerald and leaves both Eggman and his castle in the dark after the battle.
A scene in the Oval Office shows the President being told of a new invasion in Central City, to which he yells, “how can this be?!” and rushes out onto his balcony.
In an added scene, the aliens use their Vacuum Pods to remove the flames from the torches while Shadow reasserts his devotion to Doom’s Eye, who tells him of Gerald’s utopian vision for Earth, the reason for the ARK raid, and Maria’s death. Thus, Shadow recalls the deaths of her and Gerald’s colleagues over a repeating line of Tails’s from Sonic Adventure 2 about the ARK supposedly being shut down after “a terrible accident”. Then, after a flashback of Gerald informing Shadow on Maria’s illness—a critical detail the original game never elaborated on—as well as his own mortality, he’s interrupted by eerie readings of his own journal entries and final message for humanity over the famous shot of him in his electric chair. Shadow ventures off to punish mankind for their atrocities.
N/A
Only the body language and dialogue during the new invasion scene at the Oval Office have been changed, namely the President’s tired state at the start and his frantic rush onto the balcony without a word.
Egg Breaker (Cryptic Castle: Neutral Mission)
The scene before this version of the boss is repeated verbatim.
Amy still remains absent. Eggman threatens Shadow for ignoring his order, to which Shadow mocks his nonstop failures and goads him into a battle.
Shadow steps out onto the same hill from the beginning but in the shade of the red invasion clouds, pondering his muddled memories and how the Black Arms know him… then gets warped into space. Black Doom points out the ARK to him, angering Shadow when he sees G.U.N. pursuing him and Maria onboard. Black Doom pushes him to never forget his trauma and hold onto his hatred.
Instead of saying anything himself, Shadow hears previous lines he’s been told in the past two games that reflect his many thoughts and questions out of context. Black Doom informs him of Maria’s illness and fate, then tells him that, in his anger, he’s starting to understand.
Egg Breaker (Cryptic Castle: Hero Mission)
The scene before this version of the boss is repeated verbatim.
Shadow tries to ignore Amy and Cream’s argument about the latter getting lost. Eggman mentions the aliens’ temples rising to the sky before initiating the battle, which Amy aids Shadow in and Cream fails to keep Cheese from getting involved in, much to Amy’s aggravation. The two girls also let Cheese get his own extra revenge after Shadow leaves with the Emerald.
Impressed by the floating temples, Shadow’s told by Black Doom that he’d brought them to Earth over two thousand years ago as, strangely, “the perfect killing machine”. He then says a generic oppositional line as he and Shadow notice the Eggman Fleet approaching. He leaves Shadow to deal with it, and failure isn’t an option.
Shadow practically has vertigo, realizing this probably wasn’t the aliens’ first contact with Earth after all. Black Doom elaborates that the temples were sent under the guise of acting as sanctuaries for the humans, only to be weaponized against them during the invasion. He also uses his clairvoyance to identify who’s behind the Eggman Fleet before Shadow.
Prison Island
Shadow Chaos-Controls to Prison Island, thinking there might be Chaos Emeralds here. It’s then that he considers that perhaps he was once released from this place, although he’s not sure precisely from where or why.
Shadow follows the next Emerald’s energy signal here, then recalls being released here and ponders whether he was responsible for the radioactive purgatory it became.
Doom’s Eye tells him G.U.N. still has a presence here and to remove it immediately. Meanwhile, Charmy’s been left by Vector to find “top-secret discs” without knowing what that combination of words even means.
Doom’s Eye tells Shadow he’s lucky to have a vital role to play, given his actions that got him here, but that he will be punished if the Black Arms are scrubbed from the same island they were isolated to. Charmy also gets two G.U.N. Beetles off Shadow, then asks a hundred reasonable questions about his task that end with, “I don’t get paid enough for this.” The most reasonable assertion of all.
Prison Island: Dark Mission
Shadow rids the island of its human presence.
Charmy’s left grumbling over his terrible luck while Shadow carries out the aliens’ will. A lesser-known line from Doom’s Eye about the extent of human pollution is also used with some variation. When the mission’s over, he insists that Shadow not betray him again, Shadow reasons G.U.N. should back off after isolating the Black Arms, and Doom’s Eye tells him to spend his time reflecting while his next mission’s pending.
The space warp scene before The Doom follows, but the initial hill is in the bright light of noon, not darkened by the invasion clouds.
The space warp scene before The Doom follows with the previous edits retained, but the initial hill is in the bright light of noon, not darkened by the invasion clouds.
Prison Island: Neutral Mission
Shadow collects the next Emerald.
Few changes other than self-banter were made, particularly Shadow’s joke about free will as a false construct at the end.
The first Eggman scene follows.
The first Eggman scene follows with the previous edits retained, albeit with him demanding that the Eggman Fleet take flight.
The opposing fleet scene before Sky Troops follows.
The opposing fleet scene before Sky Troops follows with most of the previous edits retained, other than Shadow sounding more nonchalant and Black Doom sounding more urgent that he comply.
Prison Island: Hero Mission
Shadow helps Charmy collect the discs.
Shadow makes his annoyance vocal, partly by quoting Indiana Jones and the Temple of Doom and promising he’d only bail on the mission because Charmy’s insufferable. Then, with the discs collected, Shadow turns down helping Charmy with something else until it’s clarified that all of Team Chaotix is trying to hack into an Eggman hideout near his theme park. He also requests that Shadow keep this operation under wraps from the Federation.
Espio is in charge of hacking into Eggman’s mainframe despite it not being his specialty. A crocodile with a voice that definitely isn’t Vector’s pushes Charmy away for wanting to help. For some reason, when Shadow wanders in, he karate-chops the keyboard to open the gateway, but it’s not played up as a joke. Espio then jumps in after him to collect the data they need.
Charmy realizes for the first time that Espio’s name comes from the word “espionage”. This starts an argument with Vector that Espio does not wish to be stuck in the middle of, as well as ending unexpectedly civil. Shadow suggests that Espio simply hit the enter key, the result of which is played up comedically. Vector lets Espio through the gateway, not Charmy, leading to some more brief banter of their own.
Circus Park
Shadow says an awful line that’s been memed more than Rick Astley, then catches Tails exposition-dumping that Eggman stole rings from around the world to build his theme park. Shadow notices a Chaos Emerald on Tails, who crashes the Tornado for no discernible reason. He grimaces at the thought of robbing a dead child’s body and enters the theme park.
Shadow follows the next Emerald’s signal here, during which Tails grumbles over Eggman’s greed in the Tornado. Shadow tries to get his attention, then warn him about the fireworks, which proceed to light up the Tornado. Shadow glances about awkwardly after the crash before shrugging and figuring it’s easy pickings now.
Tails gives Shadow the information he’d previously given himself. Then, Eggman requests that Shadow remove G.U.N.’s presence from his theme park.
Tails stumbles up from the crash site and informs Shadow of the predicament, including that they can shut down the park by extracting enough rings from its attractions. They start with a shooting gallery, after which Eggman gives Shadow his own assignment.
Circus Park: Dark Mission
Shadow removes the G.U.N. units from Eggman’s theme park.
Shadow does so given his longer history with the Doc. He is laughed at for almost having a heart attack, though, and in the end, he receives the next Emerald from a reluctant Eggman and exits the park.
The first Eggman scene follows.
The first Eggman scene follows with the previous edits retained, albeit with him demanding that the Eggman Fleet take flight.
The opposing fleet scene before Sky Troops follows.
The opposing fleet scene before Sky Troops follows with most of the previous edits retained, other than Shadow sounding more disrespectful and Black Doom warning against his insolence.
Circus Park: Neutral Mission
Shadow collects the next Emerald.
This one’s mostly dialogue-free, although Shadow does get rather dizzy from all the lights and patterns. A scene’s also added at the end, where an automated victory message rewards him with the Emerald but still instructs that he return it to Eggman. Appalled by this scam, he heads off to the lab complex mentioned in the message.
The first Team Chaotix scene follows.
The first Team Chaotix scene follows with the previous edits retained.
Circus Park: Hero Mission
Shadow collects four hundred rings from the park alongside Tails.
Most of the banter consists of Shadow’s lack of enthusiasm and increasing nausea from the lights and motion. His complaints reach their peak just as the target amount’s reached, thus resulting in an awkward moment. After the next Emerald is drawn to Shadow for his deed, Tails receives a call from Sonic and tells Shadow he’s needed at Isla Nazca before heading off to deal with park security.
Back at G.U.N.’s headquarters, the Commander’s informed of the aliens’ isolation to a nonspecific forest. He authorizes all “tactical weapons”, then ends with some very discomforting dialogue.
The Commander’s informed that the Black Arms’ isolation to Isla Nazca was successful and that no new reinforcements have been reported. Reinvigorated, he learns Shadow is en route to the island and demands that all current patrol routes be maintained. It also definitely doesn’t end with him saying the name of the Monk theme because it’s punny in this context.
The Doom
In the ARK flashback, Maria requests that Shadow revive the injured researchers with heal units. Meanwhile, Doom’s Eye encourages him to quench his bloodlust on the G.U.N. units securing the facility.
Other than extended dialogue with Maria at the beginning, the healing units are hooked up to the researchers like IVs instead of simply thrown into them. Doom’s Eye also makes it clear that this is a chance for Shadow to go back and do what he should’ve done fifty years ago—in other words, Shadow isn’t recreating what he actually did to G.U.N. at the time.
The Doom: Dark Mission
Shadow enacts his revenge on G.U.N. with some decent enough lines to keep in.
Not much has changed other than a couple of modified lines and more cinematic sequences, as well as Shadow being allowed to return to Maria afterwards. I sure as hell had to keep the “Why has this tragedy occurred?” line because it’s far too thoughtful for the original game.
The Doom: Neutral Mission
Shadow reaches the goal ring.
Little dialogue is spoken until he regroups with Maria, who’s confused and disappointed by his absence.
The Doom: Hero Mission
Shadow uses the heal units on the fallen researchers while accompanied by Maria.
More small glimpses into life on the ARK are revealed, like what they’d do for seasonal recreation. Shadow also has to fight off G.U.N. to Maria’s dismay.
Heavy Dog (The Doom: Dark Mission)
Shadow and Maria look as though they’re prancing through the ARK. Then, Shadow recalls Maria begging for help, followed by Doom’s Eye reflecting on mankind’s greed to further manipulate Shadow into seeking vengeance.
Their rush through the ARK is more hurried and frantic. After improved dialogue from Heavy Dog and HQ, Shadow recalls the moment Maria was shot. Doom’s Eye also goes on about mankind’s desperation to avoid taking responsibility, as is more relevant to the context. In the end, Shadow yearns for the suffering of man, and Doom’s Eye has the perfect task in mind.
Now overlooking the real ARK in space, Black Doom’s pleased that Shadow has turned, now giving him the task to take the Eclipse Cannon to be used in the aliens’ ritual. This is also the first case of Black Doom plotting to destroy mankind when it becomes clear in the end that he intends to keep them alive.
Black Doom explains that not every Emerald is needed for the cannon’s launch, as he doesn’t intend on destroying the planet. He also further suggests that mankind has an important role to play in the insurrection.
Heavy Dog (The Doom: Neutral Mission)
The scene before this version of the boss is repeated verbatim.
The scene before this version of the boss is repeated verbatim with most of the previous edits retained, although Shadow does come off as more revulsed by G.U.N.’s actions than angered. He also desires karma for Maria’s death in the end, for which Doom’s Eye has the perfect task in mind.
The Commander comes to escort the President, who’s ashamed by his inability to keep the world united, to his escape craft. The Commander says what’s quite possibly the worst line in the game to the photo of Sonic and Shadow, and Black Doom sends Shadow off to follow the craft.
The Commander briefs the President on the casualties of the evacuation attempts, to which the President wonders if the aliens’ sentiments are warranted after all. The Commander has a more subtle line regarding Shadow specifically, and Black Doom allows Shadow to take a Black Hawk up to the G.U.N. frigate instead of tailing it on foot.
Heavy Dog (The Doom: Hero Mission)
The scene before this version of the boss is repeated verbatim.
The scene before this version of the boss is repeated verbatim with most of the previous edits retained, although Shadow does come off as more heartbroken by G.U.N.’s actions than revulsed or angered. He also decides to abandon this chapter of his life and investigate Eggman’s activities in the end, to which Doom’s Eye heeds a frustrated warning.
At Eggman’s jungle base, Shadow discovers a battalion of his clones from Heroes, and Eggman tells the “androids” that he’ll be devising a new plan inside. Shadow then makes a very on-the-nose assertion that he may be an android himself. This scene plays just before Iron Jungle instead of right after the boss.
The appearance of the androids answers Shadow’s quandary since Heroes of whether he’d been cloned. Eggman’s message to the troop reveals them as androids and their purpose to match the real Ultimate Life Form, alongside a comedic touch at the end where he requests that they don’t turn on him for sealing them away should they fail. Shadow’s concern is also left more vague with simple body language and a one-word mutter.
Sky Troops
Shadow considers if he’s seen the blue sky before when he obviously has. Doom’s Eye orders him to ground the Eggman Fleet whereas Eggman needs the jewel switches destroyed in order to ground the temples.
The initial line is cut, and Shadow destroys the first Eggman Fleet battleship at the behest of Doom’s Eye, who essentially calls Eggman a nepobaby. Shadow also mocks said nepobaby about how the Black Arms are managing to pull off in a day what he couldn’t do in years.
Sky Troops: Dark Mission
Shadow destroys much of the Eggman Fleet. Doom’s Eye also calls Eggman an incompetent imbecile, which proved satisfying enough to inspire all the brutal digs he makes in the rewrite.
After Doom’s Eye’s name-calling extends into “the Prodigal Grandson”, the same information given after the dark mission for Cryptic Castle is bestowed, Gerald and Maria flashback included, and Shadow agrees to his next task.
The White House escape scene before Air Fleet follows.
The White House escape scene before Air Fleet follows with the previous edits retained.
Sky Troops: Neutral Mission
Shadow reaches the goal ring.
With little dialogue, Shadow rides a Black Hawk along and inside the flagship’s underbelly, which was captured in an early trailer but made impossible in-game.
The Shadow Android scene before Iron Jungle follows.
In a new scene, Shadow travels through a dim passageway inside the flagship, which resembles the multi-leveled sequences in Final Fortress from Heroes. Seeing an Egg Pawn tapping away at a control console reminds him of Maria’s death and the same scene with Gerald after the dark mission for Cryptic Castle. He briefly questions the validity of these memories.
N/A
The Shadow Android scene before Iron Jungle follows with the previous edits retained.
Sky Troops: Hero Mission
Shadow shatters the jewel switches for Eggman.
Although feeling conned, Shadow agrees to help Eggman in exchange for answers, but not without correcting his misleading wording, making him look stupid by finding the Black Hawk behind its secret key gate, or calling him a hypochondriac. He also takes Eggman’s flagship over to his jungle base.
Shadow appears at Eggman’s jungle base for no given reason, then shows further contempt for Sonic when his shuttle arrives. After Sonic’s done lacing his line with incorrect wordage, Shadow joins him in chasing the Black Arms into space, namely toward the ARK where they’re headed.
Shadow has lost the next Emerald’s signal; meanwhile, Sonic asks if what Shadow just did to the temples was true, and he proudly takes credit for it and agrees to take a shuttle ride to the ARK, albeit still flooded by thoughts.
Once at the ARK, Shadow remembers his heroic sacrifice, and Sonic obnoxiously pushes him into some nondescript party.
Shadow instead recalls photos of Gerald and Maria at their best as well as their worst, then an entirely new flashback of Maria showing him around a biology exhibit on the ARK. Her fascination is retained as she shows him a virus display and discusses its uniqueness among other forms of life, prompting Shadow to ask about her illness. He’s left forlorn when he snaps back to reality and out of his past embrace with her, and Sonic both confirms the next Emerald’s signal and challenges him to a rematch to their first race on the ARK.
Mad Matrix
In Eggman’s mainframe, Espio asks for help in extracting data. Once the first terminal’s opened up, Doom’s Eye appears and says this mainframe falls next even if Digital Circuit hasn’t come before in the story path. He instructs Shadow to set off thirty bombs along the transfer web.
Espio clarifies that the file system needs to be extracted in its fragmented state to avoid corruption. Doom’s Eye reveals the aliens’ brewing conflict with Eggman to Shadow and requires far fewer than thirty explosives to be triggered.
Mad Matrix: Dark Mission
Shadow sets off the bombs for Doom’s Eye.
Doom’s Eye explains that physical entities and individuals are instantly digitized by Cyberspace gateways, making it clear that they are no longer physically tangible. In the end, the same information given after the dark mission for Cryptic Castle is bestowed, Gerald and Maria flashback included, and Shadow hopes for humanity’s sake that this is all false.
Mad Matrix: Neutral Mission
Shadow reaches the goal ring.
Shadow’s only line in this mission is toward the end about his gratitude that he hasn’t vomited yet.
Mad Matrix: Hero Mission
Shadow unlocks the terminals for Espio.
Pretty much any changes made to the dialogue consist of cute occasional banter.
Egg Breaker (Mad Matrix: Dark Mission)
Shadow and Espio are halted in their tracks by Eggman, who reiterates the notion that Shadow has no past to remember, and Espio’s swear has left me so uncomfortable, I’m legally changing my name to Lee Ving.
Espio stays absent. Eggman is both distraught and infuriated by the fall of his transfer web, but Shadow denies involvement and asks for answers. He turns down Eggman’s truce to give them if he repairs the web, and a battle replete with computer puns breaks out. Afterwards, he’s let out of Cyberspace and back into the lab by Vector, but none of Team Chaotix is happy about him aiding the Black Arms. Eggman’s base in the Southern Archipelago is discovered from the extracted data, and Shadow leaves for the site on a sour note with the investigators.
The Shadow Android scene before Iron Jungle follows.
The Shadow Android scene before Iron Jungle follows with the previous edits retained.
Egg Breaker (Mad Matrix: Neutral Mission)
The scene before this version of the boss is repeated verbatim.
Espio still remains absent. Shadow tells Eggman not to beat around the bush and divulge everything he knows, but Eggman’s holding enough of a grudge to refuse, and a fresh batch of puns is served up. Vector lets him out, Charmy admits he has vertigo, and Shadow’s given the same lead to Eggman’s jungle base. In the end, Vector hopes he can get his taxes done before Chinese is ordered.
The Sonic’s shuttle scene in the jungle follows.
The Sonic’s shuttle scene in the jungle follows with most of the previous edits retained; however, the dialogue’s obviously been modified so it matches the context.
The ARK arrival scene aboard the shuttle before Space Gadget follows.
The ARK arrival scene aboard the shuttle before Space Gadget follows with the previous edits retained.
Egg Breaker (Mad Matrix: Hero Mission)
The scene before this version of the boss is repeated verbatim. Yes. Espio swears three times. It’s surely a case of whether they could do it rather than whether they should.
After he makes an exit plan with Shadow, Espio’s swear is replaced with a reference to his embarrassing hacking session. Eggman can tell they were the ones who dumped his info and therefore refuses to offer any answers, after which the pain from all the gratuitous swears is alleviated with plentiful tech puns. After defeating him with an attack from above, they’re let out by Vector, who details what’s been found before Shadow exits disoriented but on positive terms with the team. Also, Charmy leaves Vector with a craving for raisin toast.
The Sonic’s shuttle scene in the jungle follows.
The Sonic’s shuttle scene in the jungle follows with most of the previous edits retained; however, the dialogue’s obviously been modified so it matches the context.
Shadow busts open the glass case holding the next Emerald with a line that’s also been memed, but for very different reasons. The alarm goes off, and he remembers accepting Maria’s request to help contain an incident involving escaped research subjects.
Shadow’s line and enthusiasm are mostly unchanged due to making up his only funny and charming moment from the game, and it’s Sonic’s pleas for him to snap out of his daydream that remind him of Maria’s. The dialogue when the flashback begins is also rewritten to sound more calm, naturalistic, and interpersonal, and it’s made clear that the escape occurred as a result of G.U.N.’s violent raid.
Air Fleet
Shadow appears on the G.U.N. frigate without a clear way aboard, and Tails begs him to help stop the aliens attacking the escape craft. Doom’s Eye instructs him to destroy the craft and assassinate the president onboard.
Shadow dismounts his Black Hawk and finds Tails taking down aliens using both his combat moves and technical skill. Shadow doesn’t wish to turn on the aliens, but he’s unsure of whether to help Doom’s Eye kill the President when ordered.
Air Fleet: Dark Mission
Shadow obliterates the escape craft before it can be carried to safety.
Many of Doom’s Eye’s lines are only somewhat modified or given responses from Shadow. There is an added exchange at the end, though, where Doom’s Eye sends him far lower down to the heart of G.U.N’s operations.
One of the most baffling frustrations that reflect the game’s lack of devotion in reaching a more mature audience. The escape craft makes it to G.U.N.’s subterranean headquarters without a scratch despite last being seen as a roasted skeleton. The Commander leads the untouched President inside, thus begging the question of why the assassination mission was even included, before the very bizarre notion that the entire city was evacuated amidst an unforeseeable assault is all but confirmed. It’s then brought to attention that Shadow and the Black Arms have breached the outer perimeter, to which the Commander spouts military jargon that could be arranged in literally any order. Moreover, he declares that Diablon be mobilized despite the fact that it’s, and this is the way it’s worded in the scene, “not ready yet”. Recalling a plea from Gerald, Shadow decides what needs to be done before joining the aliens in G.U.N.’s last stand.
Only the Commander storms into the office from the previous scenes, confirming the President’s fate and dismissing any reassurances. The events of Black Comet are loosely referenced, namely the death of his father and the previous commander, to make the point that the President had filled that void. When the news of the breach is given, he orders a fierce and immediate response as well as the deployment of Diablon despite the mech still being in the testing stage. Once the Commander’s rage and intent to call in Sonic are both made apparent, Shadow rejects Gerald’s original dream for humanity and promises to carry out the Black Arms’ will instead.
Air Fleet: Neutral Mission
Shadow collects the next Emerald.
Shadow vocally refuses to ground the craft or accept the Black Arms as his problem.
Shadow takes pride in only having two more Emeralds to go, then remembers the first order we saw Black Doom give him at the beginning, only reworded to sound worse. The same entity calls down for him to help stop G.U.N’s invasion on the Black Comet. A very brief scene also establishes the Black Comet’s trajectory passing the ARK.
Shadow instead recollects Black Doom witnessing his gestation on the ARK and claiming the Black Arms will be needing his help. For the first time, he realizes Gerald wasn’t alone in his creation, then recalls past lines from other characters that lead him to believe the Black Arms are where he belongs. Then, the order to quash the invasion is given with some minor variation, plus a shot of the G.U.N. frigates outside the Comet.
Air Fleet: Hero Mission
Shadow rids the frigate of attackers with Tails.
Shadow realizes how abhorrent the order he just received is, choosing to help Tails and make up for how cruelly he was duped. This leads to them considering what the aliens’ Splitter weapons are made of—likely visceral matter—and identifying the Red Slime paths left behind. Shadow then ditches Tails for the Emerald on somewhat fair terms.
Shadow recalls his heroic sacrifice and eventual cloning, figuring that the original Shadow is dead and Eggman had recreated him. Enraged, he swears to find the Doc and make him suffer for doing so. This occurs even though Eggman has not been involved in every story path, and it’s confusing as to whether Shadow somehow figures this out himself or the Emeralds he’s collected are letting him know the objective truth.
Shadow collects the Emerald but is chastised by Doom’s Eye for his betrayal. Shadow back-talks him for supposedly using him, which Doom’s Eye denies and asks if his duties to the Black Arms are over. Shadow lies that he’ll consider tailing the craft if he receives a ride out of here.
N/A
Shadow follows the next Emerald’s signal to Eggman’s jungle base, where the same events as the Shadow Android scene before Iron Jungle are repeated, only Omega drops in to save him from the androids and inform him of the stratovolcano base nearby.
N/A
This is when Shadow figures he’s a clone of his deceased predecessor, only he hears the new version of Maria’s dying wish and re-remembers what he said upon his sacrifice. Disgusted by Eggman cloning him just to stroke his own ego, he decides to hand over the Doc’s creations to G.U.N. and the aliens so they can decide the future of the planet.
Iron Jungle
Eggman requests that Shadow take care of the attacking G.U.N. units while he returns to his base’s interior. Omega also stops by, requesting that Shadow pop the Egg Balloon blimp carrying Eggman home.
It takes Eggman a while to realize this Shadow isn’t one of his androids, and at this point, he’s already inside his base and simply wants him to halt the G.U.N. standoff outside. Omega asks Shadow to bring down the blimp as it’s been deployed to deal with the opposing units, which ends with a short but witty exchange regarding the E-Series model’s lack of subtlety.
Iron Jungle: Dark Mission
Shadow stifles the G.U.N. standoff for Eggman.
It’s insinuated that Shadow’s simply clearing the way for Omega. His suggestion of this is passed off as a joke by Eggman with a hidden Roger Ebert line thrown in. Eggman also reminisces over the Hot Shot boss from Sonic Adventure 2 despite Shadow not remembering that, and in the end, Shadow recoups with Omega at the base’s entrance.
Iron Jungle: Neutral Mission
Shadow reaches the goal ring.
Shadow makes a hot burn to the Shadow Androids quoting Sonic Adventure 2, then recoups with Omega at the base’s entrance.
Iron Jungle: Hero Mission
Shadow sets the Egg Balloon ablaze for Omega.
When Shadow’s injured by a Big Foot Type A, Omega retaliates and clears him some space so he can light up the blimp.
Egg Breaker (Iron Jungle: Dark Mission)
When asked about his androids, Eggman confirms that he’d created both Shadow and Omega, then promises to turn them both into scrap metal in spite of Shadow just having gotten G.U.N. off his back.
The first instance of Eggman coining the term “disowned duo” for Shadow and Omega. After confirming Shadow’s worst fear, he requests that he hand over the Emeralds in his possession, which he turns down as the only reasonable response. In the end, Omega informs him of the stratovolcano base nearby and handles the rest of the units while Shadow retreats outside.
The Black Comet raid announcement scene before the Black Comet stage follows, except at Eggman’s jungle base.
The Black Comet raid announcement scene before the Black Comet stage follows with the previous edits retained, except at Eggman’s jungle base.
Egg Breaker (Iron Jungle: Neutral Mission)
The scene before this version of the boss is repeated verbatim.
After confirming Shadow’s worst fear, Eggman initiates the fight; in the end, Omega informs Shadow of the stratovolcano base nearby and handles the rest of the units while Shadow retreats outside.
The dead and clone Shadow epiphany scene before Lava Shelter follows, except at Eggman’s jungle base.
The dead and clone Shadow epiphany scene before Lava Shelter follows with the previous edits retained, taking place at Eggman’s jungle base like all the other instances.
Egg Breaker (Iron Jungle: Hero Mission)
The scene before this version of the boss is repeated verbatim.
Eggman’s rage slowly sets in, the state of the Egg Balloon compared to a “slow-cooked, watered-down, acid-dunked, napalm-combusted, overexposed-to-improv-comedy sugar cube”. After confirming Shadow’s worst fear, he initiates the fight; in the end, Omega informs Shadow of the stratovolcano base nearby and handles the rest of the units while Shadow retreats outside.
Shadow appears on the ARK (yes, it is jarring), only for the G.U.N. Commander to walk up to him and hold him at gunpoint (yes, it is also jarring.) He plans to put Shadow down for killing everyone he knew, resulting in a flashback of him messing around with Maria as a child and witnessing Gerald and Black Doom collaborating on Shadow’s creation with an absolutely terrifying facial reaction. Strangely, he says Maria was the only family he had, but then that he also lost his family as though they were separate people. He shoots Shadow, only to realize he somehow disappeared and reappeared behind his back before it happened. A lapse in temporal logic my brain still fails to process. Shadow accepts his responsibility for the ARK incident and leaves to make up for it, allowing the Commander to fall to his knees in shame.
The Sonic’s shuttle scene in the jungle follows with most of the previous edits retained; however, the dialogue’s obviously been modified so it matches the context.
N/A
In this version of the Commander’s revenge scene before Cosmic Fall, Shadow realizes the ARK’s collapsing to set up the next stage, and the Commander’s dropped off by a dropship. He draws his pistol but stays relaxed and casual, not verbally making it clear right away that he’s here to kill him. In the flashback, he’s a bully to Maria that just nabbed a stimulant for her illness, although he admits in his narration that he had a crush on her the whole time. He eludes to Black Comet again, namely his father’s death and the planet G.U.N. froze over, until describing the first time he saw Shadow being gestated by Gerald and Black Doom. It’s revealed after the flashback that he’s been a victim of G.U.N.’s cover-up of the ARK incident, but Shadow still accepts responsibility for being the cause of said incident and allows the Commander to put him down. He lets Shadow go instead, then throws away his gun in defeat.
Space Gadget
Shadow starts to race Sonic but is instructed by Doom’s Eye to eliminate the ARK’s defense units and grant the aliens passage onboard.
The same is the case, but when Shadow tells Doom’s Eye to find another errand boy, he’s told he was designed specifically to assist the aliens and that he’s currently on thin ice with them. This still fails to convince him, however.
Space Gadget: Dark Mission
Shadow destroys the defense units. Also, Doom’s Eye describes the chemicals in the ARK’s power plant as “concentrated energy”, which isn’t proper science.
Seeing G.U.N. units attack the Black Arms triggers the memory of Maria’s death, enraging Shadow with their continued occupation of the ARK to this day. Also, as is the case with the other missions, all Black Arm units are removed from the ARK’s interior as they need the shield generators destroyed in order to board.
The dead and clone Shadow epiphany scene before Lava Shelter follows, except inside the ARK’s power plant.
Once the defenses are cleared, he nabs the next Emerald from Sonic, angered that he’d convinced him to assist G.U.N. without ever letting him know what they did. Disillusioned and lacking anyone to trust, he convinces Doom’s Eye to grant him a Black Hawk ride away from his memories so he can investigate Eggman’s activities instead.
N/A
The new variation of the Shadow Android scene introducing Omega follows.
N/A
The dead and clone Shadow epiphany scene before Lava Shelter follows with the previous edits retained, taking place at Eggman’s jungle base like all the other instances.
Space Gadget: Neutral Mission
Shadow collects the next Emerald but loses the race to Sonic.
No dialogue or banter is spoken until the end. Sonic brags about taking the Emerald until realizing Shadow’s been waiting around for him to win. Troubled by his memories, Shadow strips the Emerald away but makes sure Sonic knows he’s not mad at him—he just calls him off while he finishes his business here.
The Commander’s revenge scene before Cosmic Fall follows.
The Commander’s revenge scene before Cosmic Fall follows with the previous edits retained.
Space Gadget: Hero Mission
Shadow collects the next Emerald and wins the race. Note that Sonic never physically appears at any point.
Sonic gets frisky and tries Shadow’s patience multiple times, like forcing him into a Black Hawk race. The annoyance becomes playful banter by the end, at which point Shadow’s hurried through the ARK’s interior to catch up with him. He grabs the Emerald first and even references a line of his from Sonic Adventure 2, much to Sonic’s butthurt annoyance. With the aliens unable to infiltrate, they agree to scout out the ARK; meanwhile, Shadow thanks him for the nostalgia trip.
Shadow visualizes the gunshot that killed Maria, as well as her dying wish that’s both drastically truncated and missing every point from her original wish.
Shadow remembers Maria sealing him in the escape pod as well as the moment she was shot, and it’s added that the soldier who shot her was shocked by what he’d done after the fact. She offers him a modified version of her dying wish, this time just a slightly less cheesy rewording of her original wish. This is then combined with Shadow awakening aboard the shuttle and Sonic pointing out the Black Comet, which they both head out to infiltrate while Shadow promises under his breath to fulfill Maria’s wish.
While aboard the ARK, Sonic points out the Black Comet and its route past Earth every fifty years as though the news headline at the beginning didn’t already tell us that. He also thinks this is funny for a reason he refuses to give. Shadow then has to get a splitting headache in order for Sonic to know the aliens might be connected to it in some way. They then head out to infiltrate the Comet.
N/A
Black Comet
Shadow arrives to do as Black Doom instructed; in the process, Knuckles appears, and he’s given the second option of simply retrieving the next Emerald. Even though Knuckles never verbally gives him this task.
The repetition of the initial task is replaced with Doom’s Eye seething at the humans taking ownership over what they don’t understand (a Black Comet connection?) Later, Knuckles tries using his own backstory to turn Shadow back.
Black Comet: Dark Mission
Shadow wipes the G.U.N. units off the Comet.
Doom’s Eye reveals in the end that two major intruders still remain deeper within.
Black Comet: Hero Mission
Shadow collects the next Emerald with Knuckles.
Shadow makes it clear that he’s not turning on the aliens over this. Other than his more overtly cold attitude, not much has changed.
Sonic and Diablon (Black Comet: Dark Mission)
When confronting Shadow, Sonic tells him he can’t let him live given what he’s become. When the Commander accuses him of being responsible for the ARK incident, Shadow doesn’t argue against it, claiming humans don’t value life and will pay with their lives for their sins.
Shadow jokes about Sonic running out of company and even calls Tails’s workshop a “jungle sweatshop”. Yes, it is relevant. Instead of aggression, Sonic is more saddened and disturbed by what he’s become, but when he says he’d mourned him since the end of Sonic Adventure 2, Shadow holds the way he laughed off his return in Heroes against him. The first instance of Shadow calling Diablon “Fisher-Price” also occurs, and when accused of the ARK incident, he makes a bitter speech about humanity being unsavable without the Black Arms’ input.
During the fight, the outward spherical wave Diablon launches is referred to as its antimatter cannon.
A simple alteration, but the antimatter cannon has been more accurately renamed to the antimatter spread.
With all seven Emeralds now in his possession, Shadow declares himself a servant to Black Doom and ends the story path with a sinister laugh.
With all seven Emeralds now in his possession, Shadow tells of how man’s atrocities toward him have left him without a purpose or place in the world until the Black Arms came around. Upon wandering off, Doom’s Eye is pleased to know he’s learned of Black Doom’s involvement in Project Shadow, then has him kneel before him. The end goal for the Black Arms is partially revealed, that the Earth and its life will be saved when the humans become their cattle.
Egg Dealer (Black Comet: Hero Mission)
Eggman just drops in front of Shadow aboard the Comet and demands that he hand over the Emeralds, which Shadow obviously refuses to do.
Eggman appears before Shadow and Knuckles, prompting the latter to paraphrase The Thing due to the Egg Dealer resembling the four-legged spider head from the defibrillation scene. Eggman makes a joke about the Comet being too “gastrointestinal” for his liking but a certain hit in the avant-garde scene, and Shadow asks why he followed them all the way through the Comet. The reasons are counted off, but Shadow rejects the notion that the Doc created him.
N/A
In the end, Shadow Fever is landed on, and before Chaos Blast finishes the battle, a doomed Eggman supposes he forgot to carry a one when programming the machine.
With all seven Emeralds now in his possession, Shadow calls himself an awesome rebel and ends the story path karate-chopping Eggman to death because this is the level of maturity it operates at.
With all seven Emeralds now in his possession, Shadow promises Eggman hasn’t seen the last of him… then gets gunned down by a Giga Trooper from behind. The Commander’s received the help of Knuckles to lure Shadow into his trap, relieved and grateful that his vendetta’s finally over. He leaves after calling Eggman off and sending out a search party for the scattered Emeralds; meanwhile, they all gather and gravitate around Shadow’s body…
Lava Shelter
Inside the volcano, Omega asks that Shadow assist him in finding Eggman while the Doc asks that he activate his defense domes.
Shadow assists Omega in his firefight with the Egg Pawns, during which Omega reveals that Eggman had accidentally made him too intelligent, thus going against the measures he took after Gamma’s betrayal and hence why he was sealed away. Shadow responds cynically to Eggman’s orders and the pompous way he always gives them.
Lava Shelter: Dark Mission
Shadow activates Eggman’s defenses.
Shadow does so, but lets Omega know beforehand that he has a plan in mind. He also argues with and pushes Eggman’s buttons the whole way through, even commenting on the impracticality of his base’s layout.
Lava Shelter: Hero Mission
Shadow collects the next Emerald with Omega.
Omega keeps taking offense to the sarcasm hidden in Shadow’s tone, even when they’re being shot at on repeat along the downward-spiraling rail at the end. He also knows the very second Eggman’s entire capacity for “ideas” has been depleted.
Egg Dealer (Lava Shelter: Dark Mission)
Eggman thanks Shadow for his duty, then asks for the Emeralds in his possession. Instead, Shadow just says he “collected them to destroy YOOOUUU!!!” Ouch. That hurt to type. Oh, and then, Omega joins him.
When asked for the Emeralds, Shadow humiliates him for believing he was only sticking around to help, then admits that all of his machines are going to be used in the real war outside. Eggman throws a hissy fit, Shadow warns him not to gamble against himself by accident, and wouldn’t you know it, the machine extracts all his rings because he wanted to keep the game fair. Also, Omega never joins Shadow in this ending.
With all seven Emeralds now in his possession, Shadow says he’ll be stronger than the original Shadow and ends the story path karate-chopping Eggman to death. You should probably get used to that ludicrous last shot.
With all seven Emeralds now in his possession, Shadow chides Eggman for only cloning him for his own sake, then promises that he’ll be helping to decide the future of the planet. He then carries the Doc away to watch his machines be repurposed.
Egg Dealer (Lava Shelter: Hero Mission)
Impressively, the scene before this version of the boss is not repeated verbatim, but Shadow does swear, so you still suffer regardless.
Eggman tries to finagle the Emeralds out of Shadow and Omega, and the former taunts him for giving his inventions sentience when they’ll only end up turning on him. He makes his ultimate intentions clear, Eggman throws a hissy fit, and the two partners are floored by Missile Fever. Also, in the end, Eggman accidentally extracts his rings, which he tells them to hurry up and collect before they flicker away like his hope.
With all seven Emeralds now in his possession, Shadow calls himself the “Ultimate BATTLE Life Form” (???) and that androids will rule before ending the story path karate-chopping Eggman to death.
With all seven Emeralds now in his possession, Shadow looks back on his predecessor’s purpose and refers to self-serving inventions of Eggman’s like himself as “supplements to hubris”, then promises to let said inventions aid either side in the grander war outside. He stops Omega before he can execute the Doc, asking to give him his front-row seat instead.
Cosmic Fall
Shadow starts by running into Doom’s Eye, who asks that he collect the next Emerald before it falls with the colony. Also, Vector’s willed into this location so he can start a meme I sort of want to punch at this point.
Shadow insists that he’s no errand boy, to which Doom’s Eye warns that he has one final chance to obey. His run-in with Vector is an awkward one, as the loudmouth asks if Shadow’s headed to a “lunar rave or somethin’,” unquote. The tabloids are a hell of a drug. He tries to avoid spelling out that he’d made a deal with G.U.N. to overlook his clandestine activities should he reactivate the ARK’s defenses for them.
Cosmic Fall: Dark Mission
Shadow collects the next Emerald.
Forlorn, Shadow claims he’d already lost his chance to save the ARK. He also identifies plutonium being stored in the power plant, implying it to be the Eclipse Cannon’s power source as another Black Comet connection.
Cosmic Fall: Hero Mission
Shadow… *sigh* …finds the “computer room” with Vector.
Vector wishes he had Nelson playing, a hint to Team Chaotix’s theme song, and Shadow keeps him from destroying the Artificial Chaos when they’re ultimately just defending their home. They also reach the security room in a very different way, taking the rocket sideways through a shaft in the wall of the ARK instead of upward into a flashing green nebula that warps them inside.
Egg Dealer (Cosmic Fall: Dark Mission)
Eggman just drops in front of Shadow aboard the ARK and demands that he hand over the Emeralds, which Shadow obviously refuses to do. Only he’s less of a dick about it.
Eggman appears before Shadow, who asks why he followed him all the way through the ARK. The reasons are counted off, but Shadow rejects the notion that the Doc created him, now knowing the two men originally responsible. Eggman’s brash in his lack of insight into how property inheritance works, or even basic French for that matter.
With all seven Emeralds now in his possession, Shadow becomes the ARK’s loyal defender, although he does only tell Eggman to leave the colony alone in an unexpected show of restraint.
With all seven Emeralds now in his possession, Shadow finds solace in his new clarity… only to look inside his mind and find nothing at all, then get shot down by a Black Assassin from behind. With the ARK and Eclipse Cannon in their grasp, Black Doom’s decided that he’s no longer to be trusted. He calls Eggman off and has the scattered Emeralds sought out; meanwhile, they all gather and gravitate around Shadow’s body…
Black Doom (Cosmic Fall: Hero Mission)
Shadow asks if he’s who the humans call the “Evil One”—a title that never existed prior—and Black Doom confirms that Shadow was made in his image. Shadow promises to avenge those who died, which disgusts Black Doom enough for him to try and put his creation down, even though it should be music to his ears.
Shadow’s question is more clear, that being whether he was misinformed on who conceived him. Black Doom assures him he was not misinformed. Initially, Shadow promising to defend the ARK by any means necessary pleases Black Doom… until it’s clarified that it won’t entail violent retribution. Thus, Black Doom decides he’s outlived his usefulness and turns on him.
With all seven Emeralds now in his possession, Shadow’s overtaken by his guilt in his own creation and the destruction he’s caused. Against Vector’s attempts at reassurance, Shadow wanders off, with his last few words and the library sequence titles sparking the theory that he’ll go on to commit suicide. Vector also ends by saying, “You could be…”; then, cue a song called “The Chosen One” during the credits.
With all seven Emeralds now in his possession, Shadow sniffles through his monologue, a major point being how he was designed to save a doomed child only to cut her time shorter. He references one of the library sequence titles before wandering off with reassurances from Vector, whose overall gist remains similar to the original.
Central City
Black Doom prepares the march into the city, telling Shadow his entire past is defined by mankind’s fear of him, their attempts to silence him, and the hatred he holds for them.
Black Doom informs Shadow of the atrocities the Black Arms had witnessed at the hands of man—it’s left vague as to whether this was when the Comet passed by Earth or inflicted on the aliens themselves, the latter being a Black Comet connection—as well as the horrific environment of Prison Island they’d created and tried to drive the aliens off to. He proposes that the hole in Shadow’s memories be filled by a thirst for mankind’s suffering, and the march begins.
Shadow goes one way and hears Doom’s Eye instruct him to set off a large bomb… I mean, bombs; the other way, Knuckles instructs him to dispose of small bombs.
Just to be more descriptive, the “macro-warheads” will eat away at the foundations of the highest skyscrapers. Meanwhile, Knuckles tells Shadow the “micro-warheads” are targeting the streets, civilians, and small businesses, garnering his consideration when one such detonation occurs nearby.
Central City: Dark Mission
Shadow sets off the large bombs.
Not much has changed other than the added building collapses, occasional dialogue, and a brief event where Shadow learns about the Red Fruits.
The Eclipse Cannon space discussion scene before The ARK stage follows.
The Eclipse Cannon space discussion scene before The ARK stage follows with the previous edits retained, only the dialogue at the start is slightly modified.
Central City: Hero Mission
Shadow gets rid of the small bombs with Knuckles.
Together, Shadow and Knuckles discover they can use a Vacuum Pod to safely contain the warheads. When they think they’re finished, Doom’s Eye expresses his disappointment, but Shadow assures him he simply deems the city’s demolition unnecessary. He’s given a task at the heart of the city that Knuckles warns him against taking.
The White House escape scene before Air Fleet follows.
The White House escape scene before Air Fleet follows with the previous edits retained.
Death Ruins
In the jungle, Shadow’s asked by Rouge to help round up the last of the Black Arms after their isolation while Doom’s Eye asks him to help guide the aliens to safety.
Rouge almost roundhouse-kicks Shadow on accident, then informs him that the Black Arms have already adapted to the jungles of Isla Nazca, so they have to be taken out before they can gain the upper hand again. Doom’s Eye attempts to gain his sympathy by portraying this operation as inhumane, given the aliens have already been isolated.
Death Ruins: Dark Mission
Shadow reaches the goal ring.
Rouge gives up upon Shadow’s exit and decides she’s becoming a bank teller after this.
Death Ruins: Hero Mission
Shadow neutralizes the aliens in the jungle with Rouge.
After a cute event with Big catching a Death Leech while fishing, Rouge complains about the odor of the mutated plants, then considers taking one of the aliens’ swords home with her. In the end, three generous G.U.N. Soldiers offer them a shortcut.
Black Bull (Death Ruins: Dark Mission)
Shadow taunts Doom’s Eye upon meeting with him, after which he’s told the Black Arms’ goal is not to kill off the humans. Rouge watches from afar as all questions are promised to be answered tomorrow. For now, though, he thanks Shadow for his service by sending Black Bull after him. Note that Black Bull has a slightly different hue than he does after Lethal Highway, so it’s unknown if it’s to fit the lighting or insinuate that there’s more than one Black Bull.
For good reason, Doom’s Eye finds Shadow’s compliance suspicious, given the moral route he’s taken thus far. Shadow says it was time for G.U.N. to back off but that two wrongs still don’t make a right, so Doom’s Eye summons Black Bull to punish him for his recent actions.
The Sonic’s shuttle scene in the jungle follows.
The Sonic’s shuttle scene in the jungle follows with most of the previous edits retained; however, the dialogue’s obviously been modified so it matches the context.
The ARK arrival scene aboard the shuttle before Space Gadget follows.
The ARK arrival scene aboard the shuttle before Space Gadget follows with the previous edits retained.
Black Bull (Death Ruins: Hero Mission)
The scene before this version of the boss is repeated verbatim.
Doom’s Eye indicates to Shadow and Rouge that there’s some benevolent aspect of the Black Arms’ plans, then sicks Black Bull on them. After the fight, Rouge says she’ll be heading to Eggman’s jungle base to rob him again, and Shadow tells her he might be headed that way himself.
The Sonic’s shuttle scene in the jungle follows.
The Sonic’s shuttle scene in the jungle follows with most of the previous edits retained; however, the dialogue’s obviously been modified so it matches the context.
The shuttle and flashback scene before Lost Impact follows.
The shuttle and flashback scene before Lost Impact follows with the previous edits retained.
The ARK
Shadow takes off on a Black Volt while ordered to take out the ARK’s defense units.
Shadow argues that the aliens will only need him onboard to capture the Eclipse Cannon, which Doom’s Eye allows in order to set up the neutral mission.
The ARK: Dark Mission
Shadow destroys the defense units.
Very little other than Shadow’s dialogue to his Black Volt has changed.
The ARK: Neutral Mission
Shadow reaches the goal ring.
Very little other than Shadow’s dialogue to his Black Volt has changed.
Blue Falcon (The ARK: Dark Mission)
The pilot of the tank engages with Shadow at the Commander’s order.
The pilot’s dozing off but jolts up at the sight of Shadow. Also, the dialogue between him and HQ is improved.
Black Doom commences his speech, mostly just declaring the aliens have won and any resistance will be met with extreme force.
In the speech, he’s far more vocal about his “recovery plan” and the pain it will have to inflict.
He bluntly goes on to say how pathetic humans are, to which the Commander responds with another excessive swear.
He instead reminds them of their nonstop mistakes and refusal to accept responsibility, citing the ARK as a key example. In clean but realistic wording, the Commander sends the order to see if the President can hear this.
The President listens in horror as Black Doom plans to start his punishments with the leaders of the planet. Note that this is when the President seems to be voiced by someone else entirely.
While similar to the original, the dialogue is rewritten and trimmed down significantly.
When the Eclipse Cannon is launched, Black Doom promises the destruction of the planet is near, even though he makes it clear other times that humanity will be spared and the planet will be saved from them. Also, the beam of the Eclipse Cannon is a deep green like the Death Star superlaser, even though it was a bluish-teal in Sonic Adventure 2.
Black Doom simply tells the world to bear witness and understand what this means for them; meanwhile, the beam is restored to its original color.
The G.U.N. headquarters breach scene before G.U.N. Fortress follows. No, the President shouldn’t have been able to survive the Eclipse Cannon launch any more than the escape craft destruction in Air Fleet.
The G.U.N. headquarters breach scene before G.U.N. Fortress follows with most of the previous edits retained; however, the dialogue’s obviously been modified so it matches the context, and Shadow dedicates the incoming assault to Gerald.
Blue Falcon (The ARK: Neutral Mission)
The scene before this version of the boss is repeated verbatim. I’m actually okay with it this time.
The scene before this version of the boss is repeated verbatim with the previous edits retained.
The Black Doom’s speech to Earth scene follows.
The Black Doom’s speech to Earth scene follows with the previous edits retained.
The Black Doom’s speech to G.U.N. scene follows.
The Black Doom’s speech to G.U.N. scene follows with the previous edits retained.
The Black Doom’s speech to the President scene follows.
The Black Doom’s speech to the President scene follows with the previous edits retained.
For some reason, the Eclipse Cannon launch scene does not occur, possibly because the raid on the Black Comet is an interruption. Instead, the Black Comet raid announcement scene before the Black Comet stage follows, except at the ARK’s observation deck.
The Eclipse Cannon launch scene follows with the previous edits retained.
N/A
The Black Comet raid announcement scene before the Black Comet stage follows with the previous edits retained, except at the ARK’s observation deck.
Lost Impact
Maria requests that Shadow stop the Artificial Chaos attacking the G.U.N. units.
Seeing how important they are to Gerald, Shadow’s reluctant to destroy them, which sets up the neutral mission.
Lost Impact: Neutral Mission
Shadow reaches the goal ring.
Early on, Maria tells him the gun lifts were proof-of-concepts for the Eclipse Cannon that became transit methods for researchers and construction workers.
The Commander’s revenge scene before Cosmic Fall follows. If you think the lack of a transition between the flashback and this is jarring, that’s completely justified.
The Maria’s gunshot and dying wish scene follows with most of the previous edits retained. Unlike the version before Final Haunt, however, Shadow snaps awake aboard Sonic’s shuttle and demands to be taken back to the ARK, even though they’re already close to the Black Comet.
N/A
The Commander’s revenge scene before Cosmic Fall follows with the previous edits retained.
Lost Impact: Hero Mission
Shadow destroys the Artificial Chaos for Maria.
Shadow fights to keep Maria behind cover and away from G.U.N., during which she comes damn near close to getting shot. Moreover, they overhear the Soldiers saying the Artificial Chaos are dropping in numbers, and the same gun lift explanation is provided, albeit reworded.
The Maria’s gunshot and dying wish scene follows.
The Maria’s gunshot and dying wish scene follows with the previous edits retained, including Sonic and Shadow on the shuttle before Final Haunt.
The Sonic and Shadow Black Comet discovery scene before Final Haunt follows.
N/A
G.U.N. Fortress
Inside G.U.N.’s headquarters, Doom’s Eye tells him to destroy the base’s mother computers. Meanwhile, Rouge asks that he help her recover the next Emerald inside.
This time, the mother computers are simply power supplies used for troop deployment; also, Shadow adamantly refuses to help Rouge for being the military’s puppet… until she makes a rare selfless move by letting him have all the Emeralds to himself.
G.U.N. Fortress: Dark Mission
Shadow destroys the mother computers.
When Rouge asks to see the Shadow she knows, he tells her he’s stuck in a crater, yet she refuses to believe this. He’s also reminded by Doom’s Eye in the end that an unexpected visitor’s awaiting him.
G.U.N. Fortress: Hero Mission
Shadow collects the next Emerald with Rouge.
Some cute banter between the two occurs when Shadow almost gets shot down by a wall turret, as well as when Rouge gets cocky before being surprised by a Big Foot Type A. She also doesn’t pull an ace on him at the last minute like he expects.
Sonic and Diablon (G.U.N. Fortress: Dark Mission)
The scene before this version of the boss is repeated verbatim, except in the heart of G.U.N.’s base.
Again, Sonic comes off as more heartbroken than angered, and Shadow holds his response to his return in Heroes against him. He also makes a similar speech to Diablon about humanity’s need for outside control.
With all seven Emeralds now in his possession, Shadow makes a sickening(ly cringeworthy) declaration that doesn’t fall in line with Black Doom’s greater goal and ends the story path with a sinister laugh.
With all seven Emeralds now in his possession, Shadow makes a sort of valid point that Sonic still sides with G.U.N. after they made him a criminal, and that he’d be singing a very different tune if they were to kill Tails. He promises justice for mankind before wandering off beside Doom’s Eye.
Black Doom (G.U.N. Fortress: Hero Mission)
Shadow argues for his betrayal by reiterating that no one tells him what to do… which he may or may not have said at any point depending on the story path.
Shadow predictably backtalks Black Doom, who’s appalled at his sudden change in direction, viewing it as proof that the human ego is all-encompassing.
With all seven Emeralds now in his possession, Shadow calls himself the conquerer of the universe (I know, quite the ambition) and ends the story path with a sinister laugh. Oof.
With all seven Emeralds now in his possession, Shadow calls mankind hopeless and the Black Arms clueless, claiming the only course of action is to wipe humanity off the planet. Because he needs humanity alive, Black Doom’s enraged by this, and Rouge isn’t any happier, marking Shadow as the sole villain of this story path.
Final Haunt
Shadow says he can feel the aliens nearby just as Black Hawks and Volts soar by. Sonic invites him with bad grammar to find the next Emerald as well as Black Doom, who tells Shadow through Doom’s Eye to raise the Comet’s defenses via shield switches.
Sonic paraphrases The Empire Strikes Back and picks up the last two Emeralds’ energy signals. Doom’s Eye then describes the Comet as a historical artifact supporting a spectrum of life and, therefore, deserving of preservation. This gets Shadow thinking, if indeed only a little.
Final Haunt: Dark Mission
Shadow hits all the shield switches.
The shield switches are renamed to defense shrines to fall line with the Black Arms’ spiritual undertones. Shadow wants to make sure Doom’s Eye knows he’s not doing this for the aliens, but as Doom’s Eye puts it, anything he does for the Comet, he does for them.
Final Haunt: Hero Mission
Shadow collects the next Emerald with Sonic.
Other than rewritten dialogue like Sonic getting teased for stating the obvious, not much has changed.
Sonic and Diablon (Final Haunt: Dark Mission)
In the game’s defense, the scene before this version of the boss is not repeated verbatim. Not in the game’s defense, Shadow claims he just takes any side that kills Sonic. You know, as though “fuck Sonic” was at all a popular mindset among fans back in 2005.
Having promised he was only defending the Comet, Shadow comes off like he’s on equal terms with Sonic. Instead, Sonic’s confused about why he hasn’t helped him find Black Doom, but as Shadow tells Diablon, he views both G.U.N. and the Black Arms as equally at fault. No, he’s not wrong on that one.
With all seven Emeralds now in his possession, Shadow calls himself the coolest—you know, with less charm than the first time he did—and that the Emeralds will make him invincible. He then ends the story path with a sinister laugh.
With all seven Emeralds now in his possession, Shadow’s told he’s paying out of pocket for Sonic’s chiropractor visit. He claims this to be the perfect conclusion (the ending, not the chiropractor visit), as both the aliens attacking the people Maria loved and the army that took her life will both pay the price for their atrocities. He tells Sonic to dust himself off and meet with him outside the ARK, as he still considers him a friend. This is done to treat it as a hero ending, as the hero ending after G.U.N. Fortress is still treated as a dark ending.
Black Doom (Final Haunt: Hero Mission)
Shadow presents his reasonable stance that the species Maria loved isn’t the Black Arms’ to ravage. Less convincingly, Black Doom argues that the Black Arms are the master race of the universe, and I can’t help but feel as though the writing for him is horribly inconsistent.
Shadow presents a similar stance as well as argue that he’s no servant for the entity to manipulate. Black Doom finds it ridiculous that he holds onto the words of an impressionable child, given she still backed up mankind at the same time her blood was on their hands—in his words, it’s Shadow who disgraces her memory. Regardless, he promises that both hedgehogs are about to join her.
With all seven Emeralds now in his possession, Shadow reiterates the value in the promise he made, as well as that the Black Arms are officially done for.
With all seven Emeralds now in his possession, Shadow proclaims that he will be controlled no longer, that no matter what happened with the Black Arms, Maria’s species will be kept safe from them. Sonic even rubs salt in Black Doom’s wounds, guaranteeing that Shadow will never be his. Buckle in for the three last stories!
Last Dark Stage: The Last Breath
N/A
Shadow meets Black Doom in the inner sanctum of the Black Comet, offering up the Emeralds and assuring him he hasn’t turned as a way of tying every dark path to this story.
N/A
In a flashback, Black Doom explains that Project Shadow required a way to reverse cell decay. Black Doom’s DNA was the key, which he offered in exchange for the Emeralds.
N/A
Shadow’s surprised to hear Gerald would’ve helped doom his own species, to which Black Doom only turns to him with judgmental silence before telling him Gerald was never one kind of man. Shadow asks if the Comet was the Black Arms’ first home, but Black Doom refuses to expound upon that, and the Comet’s shook by an unknown projectile. This was launched by the superlaser of G.U.N.’s flagship, and Shadow’s sent off to deactivate the laser and destroy the remaining fleet.
N/A
Shadow starts on a Black Volt before landing inside the flagship, at which point it starts using assets and segments from Air Fleet and G.U.N. Fortress. In the end, he finds the multi-floor control room for the laser, acquiring the help of other Black Arms to dislocate the hinges and wires holding it in place.
Last Dark Boss: Super Sonic and Astaron
N/A
Shadow confronts the Commander on the bridge but gets ambushed by Sonic, smashing him through the windshield. In the vacuum of space outside, the prototype of Diablon’s successor plays the audio from a G.U.N. bodycam during the ARK incident, which captured Maria’s dying wish. This leaves Shadow in heartbroken silence until Sonic’s words of encouragement accidentally trigger another memory: the full death row footage prior to Gerald’s execution. A surreal montage plays past lines like Amy’s pep talk from Sonic Adventure 2 over eerie imagery like a G.U.N. Soldier taking the Gerald and Maria photo, as well as a slow trickle of blood coming into view in a shot of Maria’s body. Thus, he gives a speech about the death of Gerald’s dream and the start of a new one before he and Sonic go super, one after the other.
N/A
The fight’s similar to the Sonic and Diablon battle, only airborne with all of Super Shadow’s abilities. Astaron uses wrist-mounted rockets as well as mark two of Diablon’s antimatter spread; the prongs that once guarded the superlaser generate a voltage chain that protects both boss characters at certain intervals. Also, much like “Broken” and “All of Me” by Sins of a Divine Mother as the new dark and pure dark ending themes, respectively, “Who I Am” by Magni-Fi is the theme for this boss fight.
N/A
In a scene like the original cutscene of Super Shadow zapping the Black Comet into space, he Chaos-Controls it from space to Earth’s surface, allowing its roots to be driven into the planet’s crust.
N/A
Super Shadow descends and returns to normal outside Eggman’s neon-lit lab complex, where the hero cast plus Eggman, Omega, and Team Chaotix have gathered around the crater holding Sonic’s body. They’ve all been paralyzed by the nerve gas, but Shadow stops by Eggman to tell him he knows he’s only a clone of the original Shadow, who’s still deceased. He lets him know he’s comfortable with that and grateful to have been given another chance.
N/A
Shadow’s returned to the same hill from the intro, now looking over the photo of Gerald in his electric chair. Black Doom echoes down to him that Rouge has been kidnapped by Eggman, setting up a potential dark version of Episode Solaris that will probably never happen (although I may write a short story on it, much like the dark side DLC stories of The Force Unleashed series). He recalls how a wise man once said his species would know how it feels to lose everything, then accepts the path he’s chosen while racing off past the city with a smile of contentment.
Last Neutral Stage: The Last Empire
N/A
With Eggman tied to the desk chair in his lab complex, Shadow assures Omega he hasn’t turned as a way of tying both neutral endings to this story. Shadow’s not certain he has all the answers yet, and while he grapples with that, Omega offers to inform him on the whereabouts of Metal Sonic.
N/A
In a flashback, Omega takes Metal Sonic’s deactivated remains to Final Egg, the birthplace of his predecessor Gamma, then seals him away in his stasis tank and transfers his consciousness into the unused model from Sonic Adventure (Silver Sonic II). Upon returning, he finds the glass of both stasis tanks shattered and both models missing.
N/A
Omega deduces the unused model was meant to demolish Station Square but wound up left in stasis. Hearing how Eggman snapped under the pressure of his failure reminds Shadow of Gerald, leaving him in dismay at how to preserve a legacy as complicated as his. Omega suggests that he not bother trying to represent one side of Gerald’s character or the other, which is when Shadow asks, then learns, about the unused model’s liquid mercury chassis. Thus, Shadow Androids of the same material—based on Fake Shadow from Sonic Heroes multiplayer—enter and say their new master wants a word with them. Exiting the lab reveals an army of “Metal Pawns” and “Metal Androids”, assimilated by Metal Sonic with the same substance. The robotic clone shows the duo a new base rising from the ocean, and it’s learned that he’s become aware of his own artificiality since Heroes and has already begun to assimilate Sonic and friends. Shadow heads out to save them while Omega deals with the minions.
N/A
Shadow starts down a rail that leads from Central City—an exterior laser has parted the red invasion clouds and replaced them with turquoise storm clouds—to the base’s interior, which starts using assets and segments from Iron Jungle and Lava Shelter. Here, the lava’s replaced with water, and inspiration’s taken from Final Fortress concept art from Heroes. Android Amy, Team Chaotix, Rouge, and Team Sonic in that order—also based on their fake versions from Heroes—are pumped out from refrigerated molds in the places of the lava defense domes, and after defeating and restoring each of them, Shadow tells him to hurry out while he goes after Metal Sonic, who Sonic tells him was last seen on the bridge.
Last Neutral Boss: Egg Hydra
N/A
Shadow makes it to the bridge and approaches the throne in front of the windshield, hearing previous Metal Overlord lines from whoever’s sitting there. Instead, he finds a Sonic Doll from Final Egg with a burning fuse in its head. He bursts through the windshield just as the bridge goes up in a blaze of glory.
N/A
Metal Sonic is now in the cockpit behind the central head of the Egg Hydra, the unused “Sky Chase Dragon” boss from Sonic Adventure. Metal Sonic tells Shadow he understands what it’s like to overthrow one’s own creator, and that he only wishes to remove the two armies from the picture so he can see justice win out on both sides. Yet, Shadow clings to Omega’s words, deciding in a grand speech that picking any one side would be a disservice to those who died on the ARK. He transforms into Super Shadow with the Emeralds he’s collected.
N/A
The fight is somewhat like the Egg Wyvern boss from Sonic ’06 and Episode Solaris, only airborne with all of Super Shadow’s abilities. Moreover, the open space in front of the busted bridge is modeled after the Egg Emperor boss area from Heroes as well as the original game’s unused stage, “stage9900”. This can be seen in the cityscape over the turquoise sky in the background. Orbs along the dragon’s vertebrae detach and fire their own separate lasers, alongside fire breath just like that of the scrapped boss it was based on. Its forked tail becomes a rotary stabbing instrument, and mercury android versions of G.U.N. and Black Arm units are sent after Super Shadow. Also, “Who I Am” by Magni-Fi is the theme for this boss fight.
N/A
Although barely functional, Metal Sonic climbs and clings onto the floor beneath the boss area from the wreck, which has now crashed to the sea. Seeing the false copy as pitiable for having lived a lie his whole existence—the lie that he was the real Sonic—Shadow suggests that he offer up his newly assimilated units to the two armies, then watch on with him as the fate of the world’s decided. With hesitation, Metal Sonic obliges and allows Shadow to lift him back up.
N/A
Shadow’s returned to the same hill from the intro, now glancing between the photo of Gerald and Maria and the photo of Gerald in his electric chair. Omega joins in to let him know Eggman has fled to develop a time machine, setting up a potential neutral version of Episode Solaris that will probably never happen (a short story might also branch off from this.) Shadow recalls how a wise man once said the reason for his existence was bringing a happier future through his research, only to then say his species would know how it feels to lose everything. He accepts the path he’s chosen while racing off past the city with a smile of contentment.
Last Hero Stage: The Last Way
It begins with the unnecessary addition of the same newspaper from the beginning blowing into Central City, as though to remind us of the “Fire in the Sky” headline.
This scene is entirely absent in the rewrite.
On the Black Comet, Shadow takes pride in having collected all seven Emeralds. However, Black Doom appears and orders that he hand them over. He seems to be on positive terms with Shadow, meaning the hero ending after Final Haunt does not tie into it. However, in a bizarre move, just about the entire hero cast—Eggman with them, but not Omega or Team Chaotix—rushes over after somehow boarding the Comet, demanding that he hand them the Emeralds. At this point, his relation to any of these characters is uncertain, and only Sonic and Knuckles should be on the Comet at this point. Regardless, Black Doom reveals the intent to save mankind from their self-destruction, then performs Chaos Control with the seven Emeralds.
Before this even begins, Sonic meets with Shadow outside the ARK where Space Gadget ends. Shadow assures him he hadn’t turned as a way to tie every hero ending into this story. He admits to Sonic that there’s a piece of his memories missing, a piece the Emeralds can’t restore. When Sonic doesn’t respond, Shadow turns to find Doom’s Eye in his place, who tells him to bring the Emeralds to the Black Comet.
N/A
Shadow arrives on the Comet, where Black Doom has Sonic paralyzed in the air beside him. Out of Shadow’s control, the Emeralds gravitate toward his friend’s captor, who uses them to perform Chaos Control.
The Black Comet is zapped out of space and onto Central City, upon which its roots are driven into the planet’s crust.
This scene remains completely unchanged.
Sonic yells exactly what just happened as though (a) we shouldn’t be able to tell on our own and (b) he should be able to tell himself. Black Doom reveals the Comet cannot pass the planet’s atmosphere without the Emeralds, then that his plan was aided by Gerald Robotnik himself.
Sonic asks what just happened, considering he’s… you know… inside the Comet, and Shadow demands that Black Doom answer his question. He only shows them judgmental silence before blaming them for giving mankind another day to kill each other. He explains that the Black Arm species has declined, that they will only prosper upon turning the humans into an energy source.
Black Doom explains more or less the same thing as the “Recollected” version, with the exception of different wording and without the specificity of cell decay reversal.
The Project Shadow collaboration scene before The Last Breath follows.
More exposition-dumping follows. The characters decide to fight back before freezing in place one by one as a result of the nerve gas—which has leaked its way inside the Comet, so, whoops—after which Black Doom feeds them to his larvae. By unknown means, an insignificant line from Maria frees Shadow from his paralysis, so he crushes one larva under his shoe and declares retaliation. Again, strangely, he gives Black Doom a reasonable head start out of here so he can pursue him to the inner sanctum.
Distraught by this revelation, Shadow seems convinced that this is what Gerald might’ve wanted… but refuses to disgrace his memory. Black Doom challenges Shadow to find him, zapping himself and Sonic away and sending Shadow out on a comet-wide search.
The stage uses assets and segments from Black Comet and Final Haunt. Although paralyzed, Sonic and friends cheer him on as he rushes to the inner sanctum. Along the way, certain areas require Chaos Control to pass. Even though he needs at least one Emerald to perform it. And all the Emeralds are still in Black Doom’s possession.
While the stage remains faithful to the original, only a brief message from Black Doom and Sonic is heard, and the segments requiring Chaos Control are absent.
Last Hero Boss: Devil Doom
In the inner sanctum, Black Doom insists that the Black Arms are man’s only salvation. When Shadow refuses to hear him out, Black Doom uses an unknown cognitive ability to hammer one message into his brain: that they quite literally share the same biology. Shadow crumbles to his knees, further tormented with his inability to ever truly escape his past.
In the inner sanctum, Black Doom tells of how he first took the Comet off the ground from here and how Maria nearly saved his faith in her species, both explored in Black Comet. Shadow refuses to hear him out, so he has a message forced into his mind: the full death row footage prior to Gerald’s execution. He almost gives in before Sonic shouts for him to focus on who Gerald was, not what he became, which restores a previously unseen video in Shadow’s memory. Gerald tells of his shame in helping the aliens and building the Eclipse Cannon, then that the cannon was designed to bounce the Black Comet back through space in the case of an invasion. When the heartfelt message ends, Shadow regains control, his grand speech calling himself “the culmination of one man’s dream” in a way that channels Data from Star Trek: The Next Generation. He lures the Emeralds back from Black Doom and goes super; desperate, Black Doom zaps away into space, morphs into Devil Doom, and joins with the Comet to keep it embedded in Earth’s crust. Sonic’s friends—Eggman, Omega, and Team Chaotix included—rush out of Eggman’s lab complex to watch, and once Super Shadow drops Sonic off among them, he returns to the Comet’s airspace.
Team Chaotix is now on the ARK—Vector was in search of the “computer room”, but they’re in the ARK’s observation deck, and how Espio and Charmy joined him is unknown—which implies that they’d been collecting the necessary info for what’s about to happen, although this is not made clear. In a baffling form of setup and payoff, Charmy rams himself into the keyboard, thus launching the message of Gerald’s they’re trying to play.
N/A
Not only playing on the Comet, but in G.U.N.’s headquarters as well, is Gerald’s message to Shadow regarding the Eclipse Cannon’s use to destroy the Comet in the case of an invasion. Still, the Black Arms’ goal is contradicted when Gerald says they’re going to destroy the planet, and Shadow’s renowned as the Chosen One because someone has to be. Regardless, Shadow regains control, attempts to kick a partially incorporeal entity in the face, and goes super while his co-creator transforms into Devil Doom.
N/A
Sonic and friends continue speaking to Shadow after claiming they just escaped the Comet. Somehow. Also, if it’s kept going long enough, Devil Doom will grow increasingly agitated, desperate for Shadow to understand that the humans are the parasites of their world. Then, Sonic and friends will start to succumb to the gas again, and at a certain point, Eggman will even admit Shadow never actually died, thus nullifying both his sacrifice and the intriguing mystery behind him entirely. Oh, and in the full uncut voice line Devil Doom ends on, his maniacal laughter loses its filter to the point where it’s just the actor cackling in his normal voice. Nothing to do with the writing, it’s just a weird audio goof.
Any comments from Sonic and friends are cut, the boss’s frustration is emphasized, and his last words are written to sound disappointed that the last hope for Earth has been crushed. Also, “Who I Am” by Magni-Fi is the new theme for this boss fight.
Before Shadow Chaos-Controls the Comet into space, he has an internalized line about putting the past behind him that I have to assume was an afterthought.
Minus the extra line, he also de-transforms in the Eclipse Cannon’s control room, hopes Gerald got his math right, and tosses the Emeralds into their slots so the Comet can be deflected light years away, not shattered to pieces in a way that leaves an entire race as we know it extinct.
This victory is celebrated at G.U.N.’s headquarters, during which the President declares that the whole world had gotten Gerald wrong, not realizing his message to Shadow clearly came before he swore violent retribution on all of mankind.
Although not having witnessed Gerald’s message, there is a genuine celebratory moment at G.U.N.’s headquarters, during which the Commander finally accepts the notion that his own army was behind the ARK incident. The President tells him to simply focus on reforming the military, and they end on pleasant and diplomatic terms.
A very corny victory scene between Sonic and friends follows, which keeps the question open as to who this game was made for—the same young audience as the previous games or a grungier teen audience.
A similar scene to the Sonic and friends celebration occurs, that is with a slightly different tone and Eggman ruining the moment as a comedic touch. More comedy comes with Team Chaotix concluding that their shady activities were all worth it in the end; Espio tells the rest to make a wish when Super Shadow descends outside. Amidst his warm reunion with Team Dark, Shadow notices a glum Eggman wandering off. He learns from the Doc that the original Shadow couldn’t be saved following his plummet after all—cloning was the only option. Shadow starts out dismayed before lighting up, considering he’s basically identical to the old Shadow.
Back on the ARK, Shadow repeats Maria’s last sentence without the classy Japanese touch—yeah, Sonic did it much better—before throwing his photo of Gerald and Maria away. Guess Black Doom was right about his respect for their memory after all…
Shadow’s returned to the same hill from the intro, now looking over the same photo. Rouge and Omega join him to say Eggman just captured a princess from her kingdom overseas (oof… get ready for that rewrite.) He recalls how a wise man once said the reason for his existence was bringing a happier future through his research, then accepts the path he’s chosen while racing off past the city with a smile of contentment.
Secret Scenes?
N/A
Oops! I’ll let you discover these for yourself!
Shadow the Hedgehog: Intro Illustrations
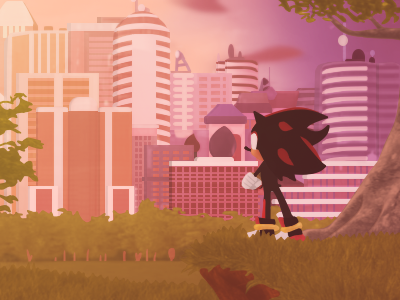
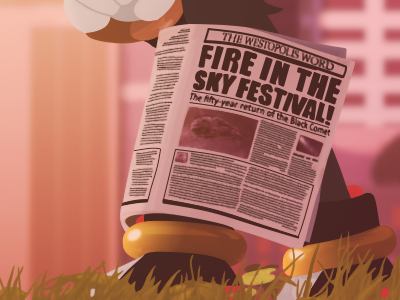
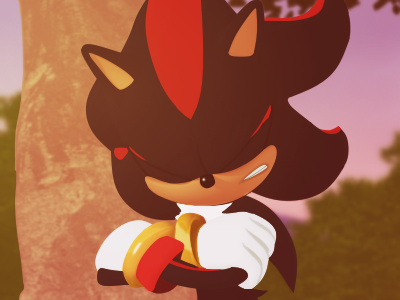

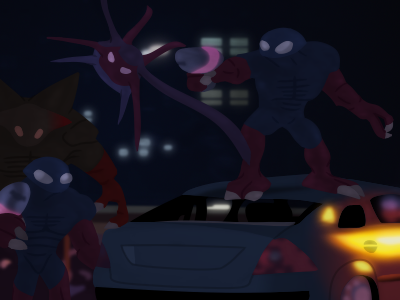
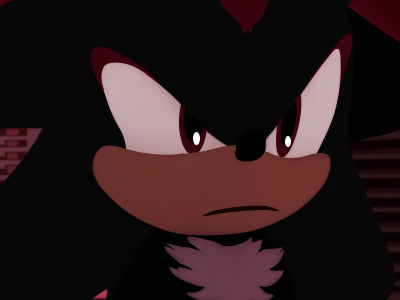
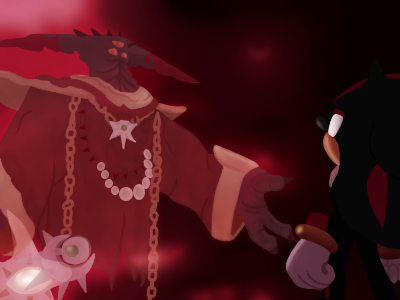
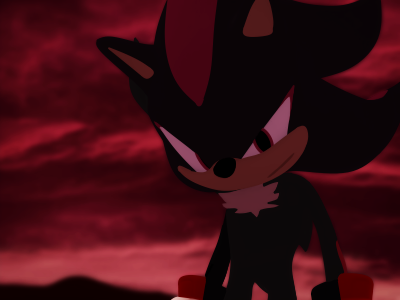
Leave a Reply